100% Pass Quiz 2026 Nutanix Newest NCM-MCI Test Assessment
Wiki Article
P.S. Free & New NCM-MCI dumps are available on Google Drive shared by BraindumpsPrep: https://drive.google.com/open?id=1PGA4sbFWz1EjHX2kULYPeayfI6UjKI4j
On the other hand, those who do not score well can again try reading all the Nutanix Certified Master - Multicloud Infrastructure v6.10 (NCM-MCI) dumps questions and then give the NCM-MCI exam. This will help them polish their skills and clear all their doubts. Also, you must note down your Nutanix Certified Master - Multicloud Infrastructure v6.10 (NCM-MCI) practice test score every time you try the Nutanix Exam Questions. It will help you keep a record of your study and how well you are doing in them.
Additionally, all operating systems also support this format. The third format is the desktop NCM-MCI Practice Exam software. It is ideal for users who prefer offline NCM-MCI exam practice. This format is supported by Windows computers and laptops. You can easily install this software in your system to use it anytime to prepare for the examination.
NCM-MCI Test Collection | Latest NCM-MCI copyright Questions
BraindumpsPrep believes in customer satisfaction and strives hard to make the entire Nutanix NCM-MCI exam preparation process simple, smart, and successful. To achieve this objective the BraindumpsPrep is offering the top-rated and real NCM-MCI exam questions in three different NCM-MCI Exam study material formats. These NCM-MCI exam questions formats are Nutanix NCM-MCI copyright files, desktop practice test software, and web-based practice test software.
Nutanix Certified Master - Multicloud Infrastructure v6.10 Sample Questions (Q15-Q20):
NEW QUESTION # 15
Task 15
An administrator found a CentOS VM, Cent_Down, on the cluster with a corrupted network stack. To correct the issue, the VM will need to be restored from a previous snapshot to become reachable on the network again.
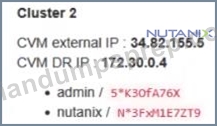
VM credentials:
Username: root
Password: nutanix/4u
Restore the VM and ensure it is reachable on the network by pinging 172.31.0.1 from the VM.
Power off the VM before proceeding.
Answer:
Explanation:
See the Explanation for step by step solution
Explanation:
To restore the VM and ensure it is reachable on the network, you can follow these steps:
Log in to the Web Console of the cluster where the VM is running.
Click on Virtual Machines on the left menu and find Cent_Down from the list. Click on the power icon to power off the VM.
Click on the snapshot icon next to the power icon to open the Snapshot Management window.
Select a snapshot from the list that was taken before the network stack was corrupted. You can use the date and time information to choose a suitable snapshot.
Click on Restore VM and confirm the action in the dialog box. Wait for the restore process to complete.
Click on the power icon again to power on the VM.
Log in to the VM using SSH or console with the username and password provided.
Run the command ping 172.31.0.1 to verify that the VM is reachable on the network. You should see a reply from the destination IP address.
Go to VMS from the prism central gui
Select the VMand go to More -> Guest Shutdown
Go to Snapshots tab and revert to latest snapshot available
power on vm and verify if ping is working
NEW QUESTION # 16
Task 8
Depending on the order you perform the exam items, the access information and credentials could change. Please refer to the other item performed on Cluster B if you have problems accessing the cluster.
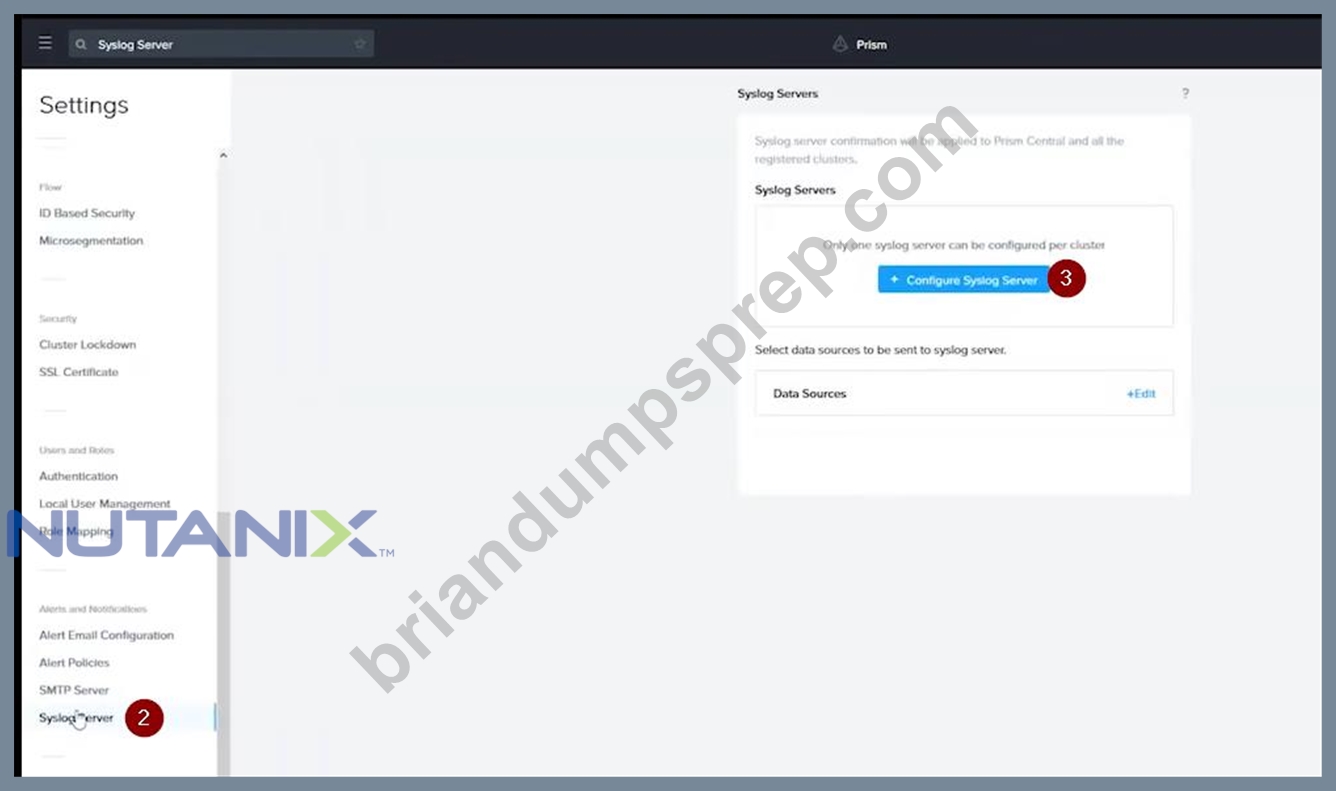
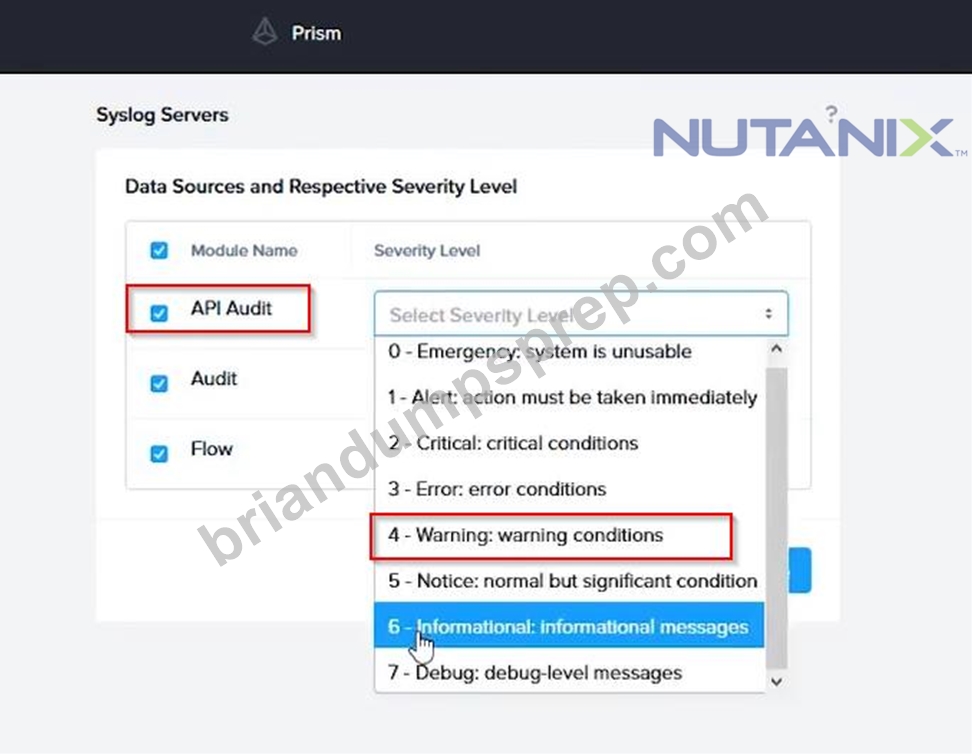
The infosec team has requested that audit logs for API Requests and replication capabilities be enabled for all clusters for the top 4 severity levels and pushed to their syslog system using highest reliability possible. They have requested no other logs to be included.
Syslog configuration:
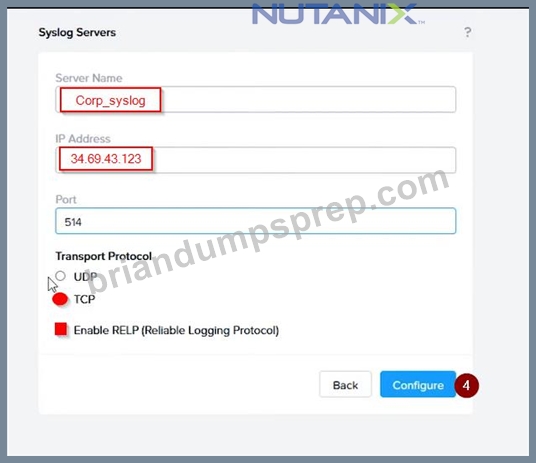
Syslog Name: Corp_syslog
Syslop IP: 34.69.43.123
Port: 514
Ensure the cluster is configured to meet these requirements.
Answer:
Explanation:
See the Explanation for step by step solution
Explanation:
To configure the cluster to meet the requirements of the infosec team, you need to do the following steps:
Log in to Prism Central and go to Network > Syslog Servers > Configure Syslog Server. Enter Corp_syslog as the Server Name, 34.69.43.123 as the IP Address, and 514 as the Port. Select TCP as the Transport Protocol and enable RELP (Reliable Logging Protocol). This will create a syslog server with the highest reliability possible.
Click Edit against Data Sources and select Cluster B as the cluster. Select API Requests and Replication as the data sources and set the log level to CRITICAL for both of them. This will enable audit logs for API requests and replication capabilities for the top 4 severity levels (EMERGENCY, ALERT, CRITICAL, and ERROR) and push them to the syslog server. Click Save.
Repeat step 2 for any other clusters that you want to configure with the same requirements.
To configure the Nutanix clusters to enable audit logs for API Requests and replication capabilities, and push them to the syslog system with the highest reliability possible, you can follow these steps:
Log in to the Nutanix Prism web console using your administrator credentials.
Navigate to the "Settings" section or the configuration settings interface within Prism.
Locate the "Syslog Configuration" or "Logging" option and click on it.
Configure the syslog settings as follows:
Syslog Name: Enter "Corp_syslog" as the name for the syslog configuration.
Syslog IP: Set the IP address to "34.69.43.123", which is the IP address of the syslog system.
Port: Set the port to "514", which is the default port for syslog.
Enable the option for highest reliability or persistent logging, if available. This ensures that logs are sent reliably and not lost in case of network interruptions.
Save the syslog configuration.
Enable Audit Logs for API Requests:
In the Nutanix Prism web console, navigate to the "Cluster" section or the cluster management interface.
Select the desired cluster where you want to enable audit logs.
Locate the "Audit Configuration" or "Security Configuration" option and click on it.
Look for the settings related to audit logs and API requests. Enable the audit logging feature and select the top 4 severity levels to be logged.
Save the audit configuration.
Enable Audit Logs for Replication Capabilities:
In the Nutanix Prism web console, navigate to the "Cluster" section or the cluster management interface.
Select the desired cluster where you want to enable audit logs.
Locate the "Audit Configuration" or "Security Configuration" option and click on it.
Look for the settings related to audit logs and replication capabilities. Enable the audit logging feature and select the top 4 severity levels to be logged.
Save the audit configuration.
After completing these steps, the Nutanix clusters will be configured to enable audit logs for API Requests and replication capabilities. The logs will be sent to the specified syslog system with the highest reliability possible.
ncli
<ncli> rsyslog-config set-status enable=false
<ncli> rsyslog-config add-server name=Corp_Syslog ip-address=34.69.43.123 port=514 network-protocol=tdp relp-enabled=false
<ncli> rsyslog-config add-module server-name= Corp_Syslog module-name=APLOS level=INFO
<ncli> rsyslog-config add-module server-name= Corp_Syslog module-name=CEREBRO level=INFO
<ncli> rsyslog-config set-status enable=true
https://portal.nutanix.com/page/documents/kbs/details?targetId=kA00e0000009CEECA2
NEW QUESTION # 17
Refer to the exhibit.
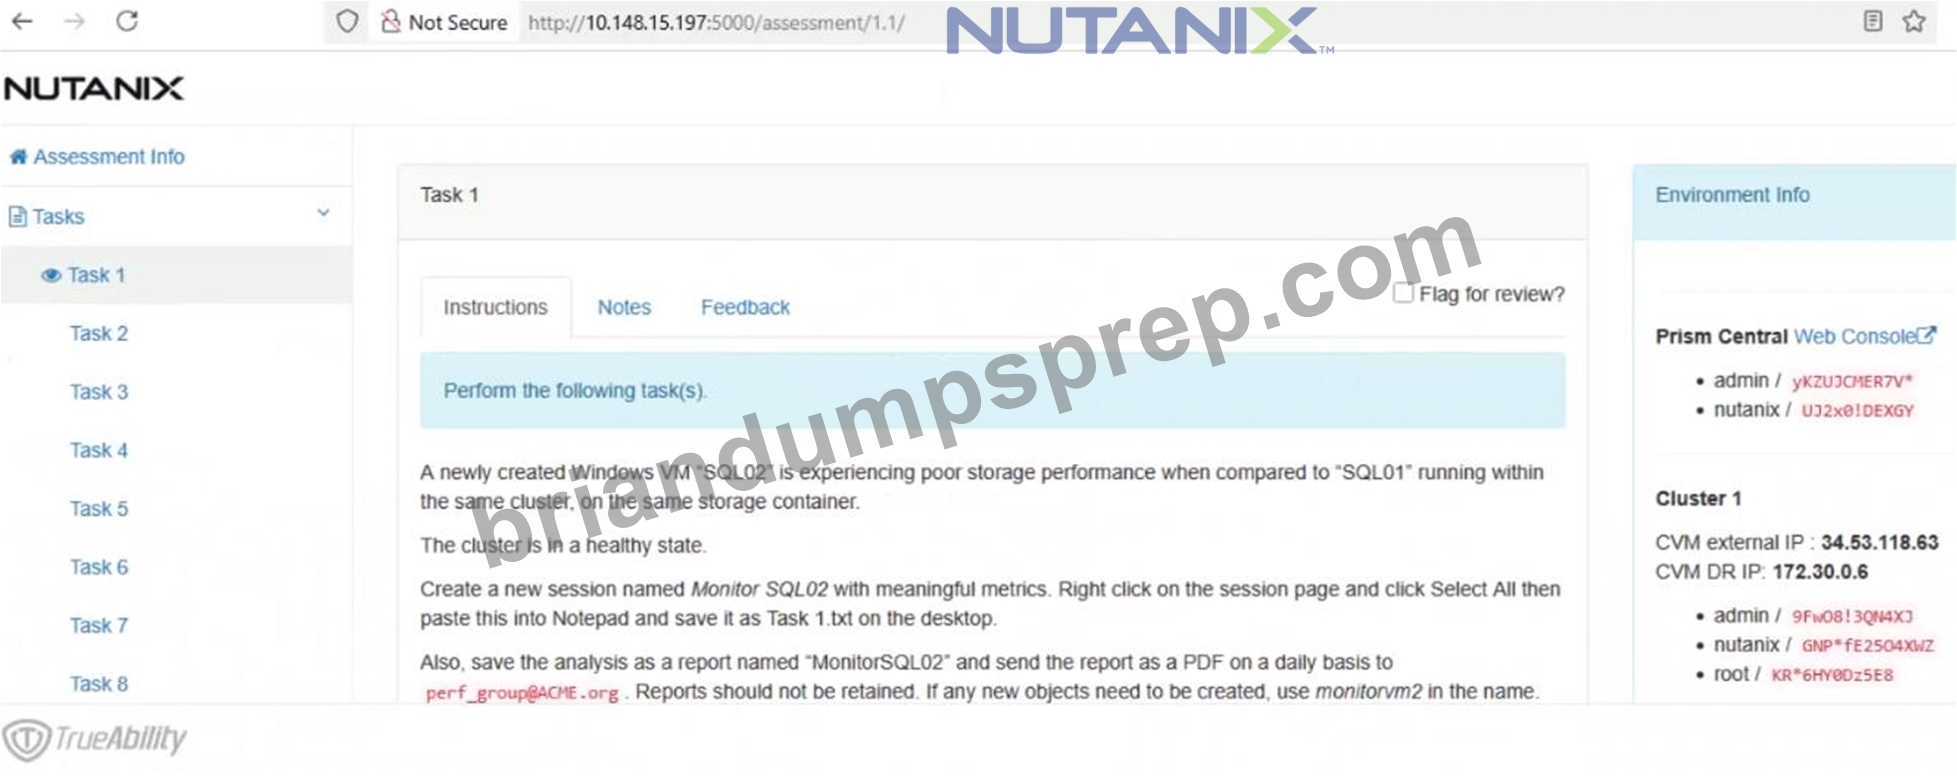
Task1
A newly created Windows VM "SQL02" is experiencing poor storage performance when compared to "SQL01" running within the same cluster, on the same storage container.
The cluster is in a healthy state.
Create a new session named Monitor SQL02 with meaningful metrics. Right click on the session page and click Select All then paste this into Notepad and save it as Task 1.txt on the desktop.
Also, save the analysis as a report named "MonitorSQL02" and send the report as a PDF on a daily basis to [email protected]. Reports should not be retained. If any new objects need to be created, use monitorvm2 in the name.
Finally, correct the issue within "SQL02"
Notes:
Do not power on the VMs.
While you will be creating a session, you will need to examine the VM configurations to determine the issue.
Do not delete the VM to resolve the issue, any other destructive change is acceptable
Answer:
Explanation:
See the Explanation
Explanation:
This is a classic Nutanix performance troubleshooting scenario. The issue is almost certainly that the VM was created using the wrong Disk Bus Type (IDE or SATA instead of SCSI).
Here is the step-by-step solution to complete Task 1.
Part 1: Analysis and Reporting
Create the Session
Log in to Prism Central (or Prism Element, depending on the exam environment, but Analysis is usually a PC feature).
Navigate to Operations -> Analysis.
Click New Session.
Name: Monitor SQL02
Entity: Search for and select the VM named SQL02.
Metrics: Since the issue is storage performance, search for and add these specific metrics:
Hypervisor IOPS (or Controller IOPS)
Hypervisor IO Latency (or Controller IO Latency)
Hypervisor IO Bandwidth
Click Save.
Save Session Data (Task 1.txt)
Open the "Monitor SQL02" session you just created.
(Per instructions): Right-click anywhere on the chart/data area -> Click Select All.
Copy the selected text (Ctrl+C).
Open Notepad on the provided desktop.
Paste the data.
Save the file as Task 1.txt on the Desktop.
Create and Schedule the Report
While still in the Analysis session, click the Create Report (or "Add to Report") button.
Report Name: MonitorSQL02
Report Settings:
Format: PDF
Frequency: Daily
Email Recipient: [email protected]
Retention: 0 (or "Do not retain", as requested).
Note: If the system forces you to create a new Report object and MonitorSQL02 is rejected, use monitorvm2 as the name per the instructions.
Save/Schedule the report.
Part 2: Diagnose and Fix the Issue
The Issue:
VM SQL02 was likely created with its data disks set to IDE or SATA.
Why this causes poor performance: IDE/SATA are emulated hardware with high CPU overhead and low queue depths (single-threaded).
The Standard: SQL01 (the healthy VM) is using SCSI, which is multithreaded and optimized for virtualization.
The Fix (Steps):
Navigate to the VM list in Prism.
Select SQL02 and click Update (or Edit).
Scroll down to the Disks section.
Identify the data disk(s). You will see the Bus Type listed as IDE or SATA.
Do not delete the VM. instead, perform a disk conversion (destructive change to the disk is allowed, but we want to keep the data).
Method to Convert (Clone to SCSI):
Hover over the IDE/SATA disk to see the path/filename of the vDisk (or write it down).
Click Add New Disk.
Operation: select Clone from ADSF file.
Path: Browse to the storage container and select the file associated with the current IDE disk.
Bus Type: Select SCSI (This is the critical fix).
Index: Ensure it doesn't conflict with existing disks (usually index 1 or higher for data).
Click Add.
Once the new SCSI disk is added, find the original IDE/SATA disk and click the X to remove it.
Click Save.
Note: You do not need to power on the VM to verify. The change from IDE to SCSI allows the VM to use the Nutanix VirtIO drivers for maximum storage performance.
NEW QUESTION # 18
Task 11
An administrator has noticed that after a host failure, the SQL03 VM was not powered back on from another host within the cluster. The Other SQL VMs (SQL01, SQL02) have recovered properly in the past.
Resolve the issue and configure the environment to ensure any single host failure affects a minimal number os SQL VMs.
Note: Do not power on any VMs
Answer:
Explanation:
See the Explanation for step by step solution
Explanation:
One possible reason why the SQL03 VM was not powered back on after a host failure is that the cluster was configured with the default (best effort) VM high availability mode, which does not guarantee the availability of VMs in case of insufficient resources on the remaining hosts. To resolve this issue, I suggest changing the VM high availability mode to guarantee (reserved segments), which reserves some memory on each host for failover of VMs from a failed host. This way, the SQL03 VM will have a higher chance of being restarted on another host in case of a host failure.
To change the VM high availability mode to guarantee (reserved segments), you can follow these steps:
Log in to Prism Central and select the cluster where the SQL VMs are running.
Click on the gear icon on the top right corner and select Cluster Settings.
Under Cluster Services, click on Virtual Machine High Availability.
Select Guarantee (Reserved Segments) from the drop-down menu and click Save.
To configure the environment to ensure any single host failure affects a minimal number of SQL VMs, I suggest using anti-affinity rules, which prevent VMs that belong to the same group from running on the same host. This way, if one host fails, only one SQL VM will be affected and the other SQL VMs will continue running on different hosts.
To create an anti-affinity rule for the SQL VMs, you can follow these steps:
Log in to Prism Central and click on Entities on the left menu.
Select Virtual Machines from the drop-down menu and click on Create Group.
Enter a name for the group, such as SQL Group, and click Next.
Select the SQL VMs (SQL01, SQL02, SQL03) from the list and click Next.
Select Anti-Affinity from the drop-down menu and click Next.
Review the group details and click Finish.
I hope this helps. How else can I help?
https://portal.nutanix.com/page/documents/details?targetId=AHV-Admin-Guide-v6_5:ahv-affinity-policies-c.html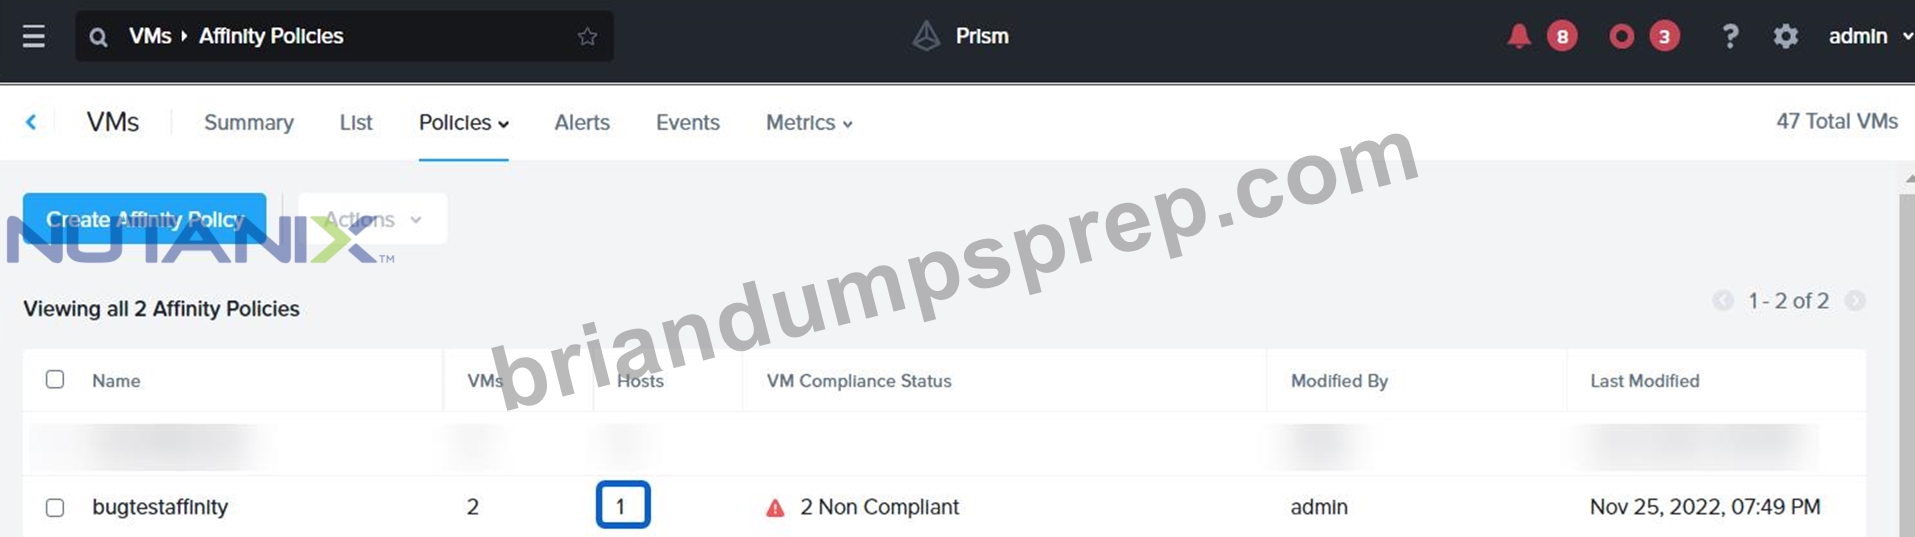
NEW QUESTION # 19
Task 14
The application team has requested several mission-critical VMs to be configured for disaster recovery. The remote site (when added) will not be managed by Prism Central. As such, this solution should be built using the Web Console.
Disaster Recovery requirements per VM:
Mkt01
RPO: 2 hours
Retention: 5 snapshots
Fin01
RPO: 15 minutes
Retention: 7 days
Dev01
RPO: 1 day
Retention: 2 snapshots
Configure a DR solution that meets the stated requirements.
Any objects created in this item must start with the name of the VM being protected.
Note: the remote site will be added later
Answer:
Explanation:
See the Explanation for step by step solution
Explanation:
To configure a DR solution that meets the stated requirements, you can follow these steps:
Log in to the Web Console of the source cluster where the VMs are running.
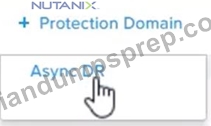
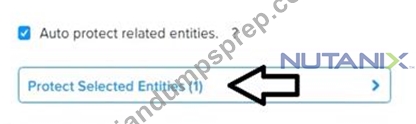
Click on Protection Domains on the left menu and click on Create Protection Domain.
Enter a name for the protection domain, such as PD_Mkt01, and a description if required. Click Next.
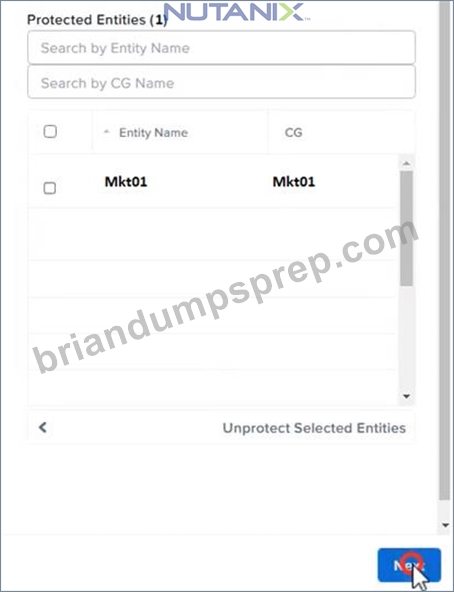
Select Mkt01 from the list of VMs and click Next.
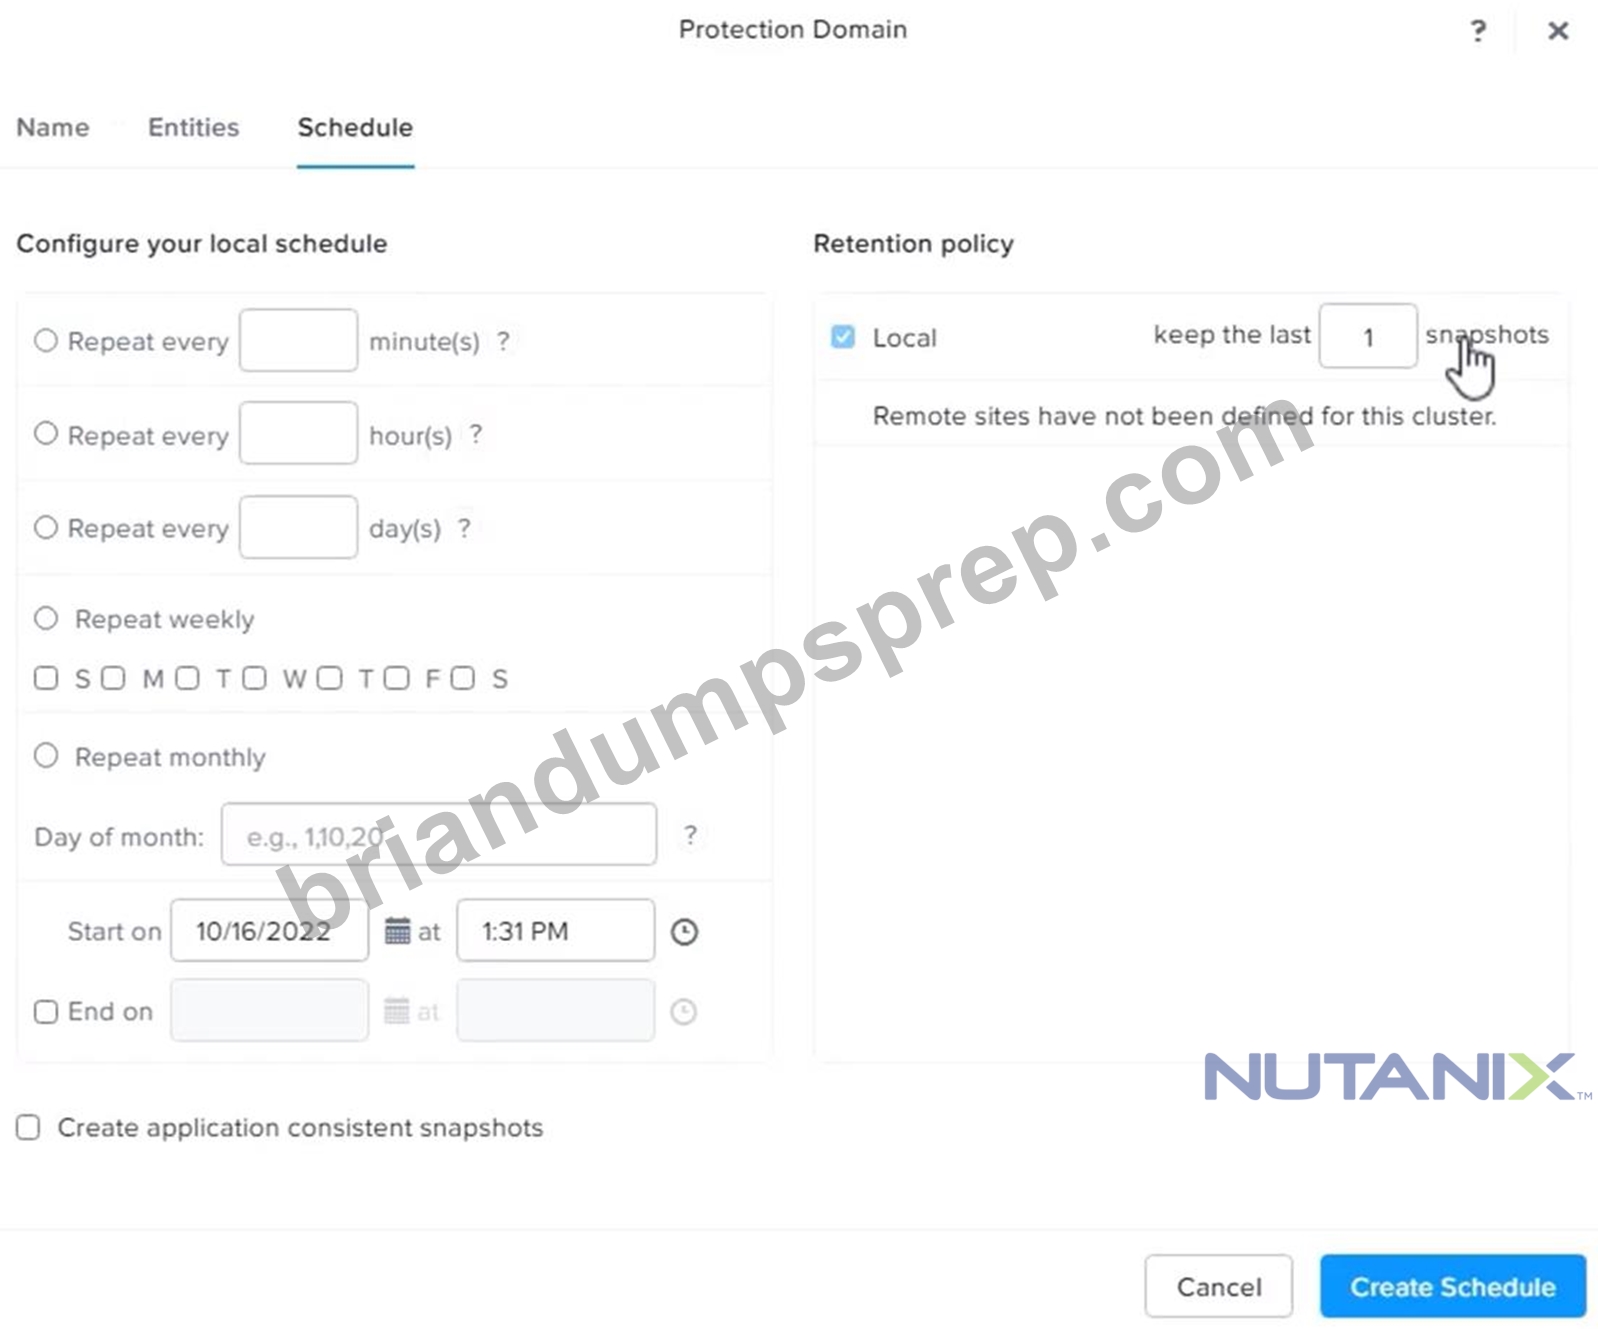
Select Schedule Based from the drop-down menu and enter 2 hours as the interval. Click Next.
Select Remote Site from the drop-down menu and choose the remote site where you want to replicate the VM. Click Next.
Enter 5 as the number of snapshots to retain on both local and remote sites. Click Next.
Review the protection domain details and click Finish.
Repeat the same steps for Fin01 and Dev01, using PD_Fin01 and PD_Dev01 as the protection domain names, and adjusting the interval and retention values according to the requirements.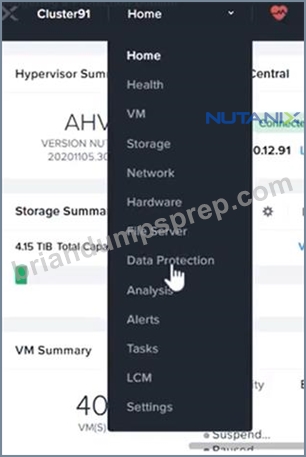


NEW QUESTION # 20
......
Once you start to become diligent and persistent, you will be filled with enthusiasms. Nothing can defeat you as long as you are optimistic. We sincerely hope that our NCM-MCI study materials can become your new purpose. Our NCM-MCI study materials can teach you much practical knowledge, which is beneficial to your career development. In order to survive in the society and realize our own values, learning our NCM-MCI Study Materials is the best way. Never top improving yourself. The society warmly welcomes struggling people.
NCM-MCI Test Collection: https://www.briandumpsprep.com/NCM-MCI-prep-exam-copyright.html
Nutanix NCM-MCI Test Assessment This training materials is helpful to the candidates, We believe that you will like the Software version of our NCM-MCI exam questions, BraindumpsPrep.com Practice Tests for NCM-MCI Exam provide you with multiple advantages: You learn the real exam scenario through these innovatively prepared tests, Purchase our NCM-MCI learning materials and stick with it.
Note that there is no way to stop this sound once started, except NCM-MCI Test Assessment to close the document, Setting Up an Audio Monitoring System, This training materials is helpful to the candidates.
We believe that you will like the Software version of our NCM-MCI Exam Questions, BraindumpsPrep.com Practice Tests for NCM-MCI Exam provide you with multiple advantages: NCM-MCI You learn the real exam scenario through these innovatively prepared tests.
Nutanix NCM-MCI Exam is Easy with Our Trustable NCM-MCI Test Assessment: Nutanix Certified Master - Multicloud Infrastructure v6.10 Effectively
Purchase our NCM-MCI learning materials and stick with it, Latest NCM-MCI exam questions are assembled in our practice test modernizes your way of learning and replaces the burdensome preparation techniques with flexible learning.
- Test NCM-MCI Prep ???? Exam NCM-MCI Topics ???? Valid Test NCM-MCI Format ???? Simply search for ▶ NCM-MCI ◀ for free download on ▛ www.dumpsmaterials.com ▟ ????Free NCM-MCI Pdf Guide
- Take Your Exam Preparations Anywhere with Portable Nutanix NCM-MCI PDF Questions from Pdfvce ???? Simply search for 【 NCM-MCI 】 for free download on ▶ www.pdfvce.com ◀ ????Free NCM-MCI Pdf Guide
- NCM-MCI Actual Questions ???? Pdf NCM-MCI Format ⬅ NCM-MCI Dump Torrent ???? Go to website ( www.prep4sures.top ) open and search for [ NCM-MCI ] to download for free ????Test NCM-MCI Dump
- NCM-MCI Reliable Exam Online ???? NCM-MCI Exam Questions ???? NCM-MCI Dump Torrent ???? The page for free download of “ NCM-MCI ” on 《 www.pdfvce.com 》 will open immediately ????Pdf NCM-MCI Format
- 100% Pass 2026 Nutanix Perfect NCM-MCI: Nutanix Certified Master - Multicloud Infrastructure v6.10 Test Assessment ???? Search for “ NCM-MCI ” and download it for free on ⏩ www.examcollectionpass.com ⏪ website ????NCM-MCI Dump Torrent
- Pass the Nutanix Exam with Pdfvce Nutanix NCM-MCI Exam Questions ???? Search for ⏩ NCM-MCI ⏪ and obtain a free download on ➥ www.pdfvce.com ???? ✴Sample NCM-MCI Questions Answers
- NCM-MCI Actual Questions ???? NCM-MCI Dump Torrent ???? Pdf NCM-MCI Format ???? Enter ☀ www.prepawayete.com ️☀️ and search for ➠ NCM-MCI ???? to download for free ????Sample NCM-MCI Questions Answers
- Exam NCM-MCI Topics ⬅ Pdf NCM-MCI Format ???? NCM-MCI Exam Questions ???? “ www.pdfvce.com ” is best website to obtain “ NCM-MCI ” for free download ????Test NCM-MCI Dump
- High Pass-Rate NCM-MCI Test Assessment - Best Accurate Source of NCM-MCI Exam ⤵ ➤ www.easy4engine.com ⮘ is best website to obtain ✔ NCM-MCI ️✔️ for free download ????NCM-MCI Latest Dumps Questions
- 100% Pass 2026 Nutanix Perfect NCM-MCI: Nutanix Certified Master - Multicloud Infrastructure v6.10 Test Assessment ???? Download [ NCM-MCI ] for free by simply searching on ▛ www.pdfvce.com ▟ ????Free NCM-MCI Pdf Guide
- High Pass-Rate NCM-MCI Test Assessment - Best Accurate Source of NCM-MCI Exam ???? Download “ NCM-MCI ” for free by simply entering ➠ www.prepawayexam.com ???? website ▶Test NCM-MCI Guide Online
- bookmark-media.com, bookmarkrange.com, esocialmall.com, laraanvo956257.national-wiki.com, lilyfbuk935638.bloggip.com, marleyekjh536825.life-wiki.com, rafaeluzzo747336.wikibyby.com, heathmouk065969.thenerdsblog.com, mayaoyai284862.blogdeazar.com, training.oraclis.co.za, Disposable vapes
2026 Latest BraindumpsPrep NCM-MCI copyright and NCM-MCI copyright Free Share: https://drive.google.com/open?id=1PGA4sbFWz1EjHX2kULYPeayfI6UjKI4j
Report this wiki page